NTRIP Client
The NTRIP client is the software that fetches data from the Internet and sends it to the serial port for the rover to use, as an alternative to a radio link.
Note
The acronym NTRIP (Network Transport of RTCM data over IP) refers to a protocol for moving RTK correction data from the base to the rover over the Internet. This is particularly useful in areas where traditional radios do not work well because of trees or hills.
RTK (Real-Time Kinematic) is an advanced technique used to improve the accuracy of satellite positioning data. It combines GNSS signals (from systems such as GPS, Galileo, GLONASS or BeiDou) with a ground reference station to obtain highly accurate positions in real time.
In particular, it corrects errors due to atmospheric delays, satellite clock errors and other interference, reducing the gap between the position computed by the mobile device and its true physical position. RTK GNSS accuracy can reach a few centimetres, which makes it ideal for applications such as precision farming, topographic surveying and autonomous navigation.
Warning
If you use the receiver over Bluetooth, the first time you have to pair it with the Android device by searching for it in the device’s Bluetooth settings. No PIN or password is needed for this.
Lefebure NTRIP Client
Lefebure NTRIP Client is an Android app and NMEA data logger. It uses a Bluetooth SPP connection to a GPS receiver, but the Android version can also connect to a remote receiver over TCP/IP or UDP.
Download the latest version from the Play Store.
To use Lefebure NTRIP Client you need:
- An Android device that supports the Bluetooth Serial Port Profile (SPP), or TCP/IP or UDP
- A GNSS receiver that can use correction data, with a Bluetooth module for the GNSS receiver where applicable
- A real-time GNSS network from which correction data can be obtained over the Internet
- A mobile data plan with good signal quality
Initial settings
- Allow unknown sources on your Android system:
- Download and install the application from the Google Play Store
- Enable the developer options so that you can use mock locations
- Enable developer mode:
- Enable the “mock location”:
- Disable Wi-Fi positioning to avoid position jumps:
Rover settings
- Make sure you have correctly paired the external receiver with your Android device
- Turn Bluetooth on on your smartphone
- Start the Lefebure NTRIP Client app from its icon
- Tap the gear icon to open the configuration menu
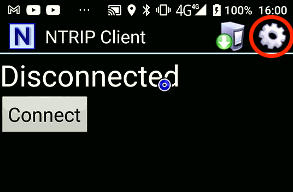
Fig.1 Lefebure, the settings button
- Select Receiver Settings and set them as in the figure below:
- the connection to the external receiver over Bluetooth
- the Bluetooth device set to the name of the BT connection (e.g. MS2-XXXXXXXXXXX)
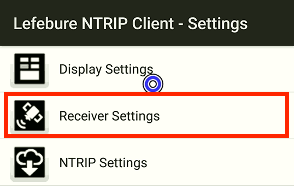
Fig.2 Lefebure, general settings
You can log the GNSS data and/or the NTRIP network data by ticking the relevant options.
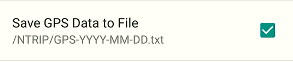
Fig.3 Lefebure, “save log file”
Once the connection between receiver and Android device is configured, you can move on to the NTRIP network settings: go back to the settings menu and select NTRIP Settings (see Fig.2)
Note
The app shows the status information of the MS2 receiver, which can be configured in the Display Settings menu
The screen in Fig.2 shows the configuration parameters for:
- the Display settings
- the Rover settings
- the NTRIP network settings
Scrolling down the same screen, on some devices you can also choose Audio Alert on Fix Change, which automatically plays a sound of your choice on the Android device whenever the real-time solution changes.
Warning
On recent versions of Android this function is no longer available
As soon as you open Receiver Settings you scroll through the parameters to be set (for instance the source of the incoming data over Bluetooth)
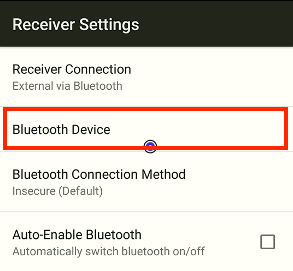
Fig.4 Lefebure, TCP/IP settings
Note
Tick the last entry below, GPS mock location, so that the position can be shared with the apps that need geolocation. The position now comes from the external antenna through Lefebure NTRIP Client, which you can leave running in the background.
NTRIP network settings
Once the connection with the remote server (the GNSS network) is established, the app asks you to select the NTRIP mountpoint you want to receive the corrections from. At this point you enter the parameters as in the figure below:
- Network Protocol (the type of data exchange protocol, e.g. NTRIP 1.0)
- Caster IP (the IP address of the GNSS network)
- Caster Port (the port associated with the IP address of the GNSS network)
- Username (the user name you were given when you registered with the GNSS network)
- Password (the password you were given when you registered with the GNSS network)
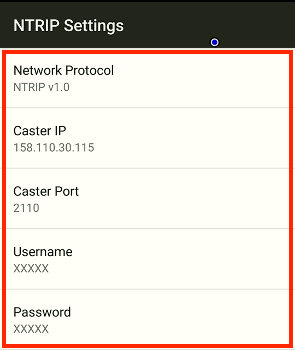
Fig.5 Lefebure, NTRIP settings
Note
You can save the network profile with the “Save profiles” button, giving it a name so that it can be recalled more easily later on, as shown in the figure below
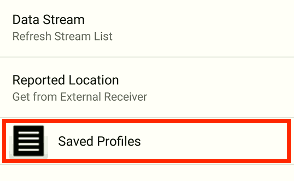
Fig.6 Lefebure, “Save Profiles”
Display settings
At this point the service can be started with the “Connect” button on the main screen.
So that the most important parameters of the service, described shortly, are shown properly, you can arrange the display to your liking from the screen called “Display Settings”:
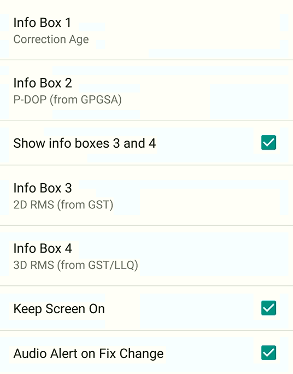
Fig.7 Lefebure, display settings
For example, they can be set like this:
- Info Box 1: Correction Age
- Info Box 2: PDOP (from GPGSA)
- Info Box 3: 2D RMS (from GPGST)
- Info Box 4: 2D RMS (from GPGST/LLQ)
Starting the connection
Once the settings above are done, all that is left is to go back to the main screen and connect, by pressing the Connect button
On the next screen, while connected, you see the data received in real time from the external GNSS receiver (Bluetooth). Note at the top:
- the RTK solution (fix) with the number of satellites beside it
- the message delay (age, in seconds)
- the PDOP (the satellite geometry)
- the HRMS (horizontal root mean square error)
- the VRMS (vertical root mean square error)
Just below, the yellow bar shows the amount of data received through the internal modem from the RTK correction network, in bytes. Further down you can switch, by tapping the top left, between:
- the service log
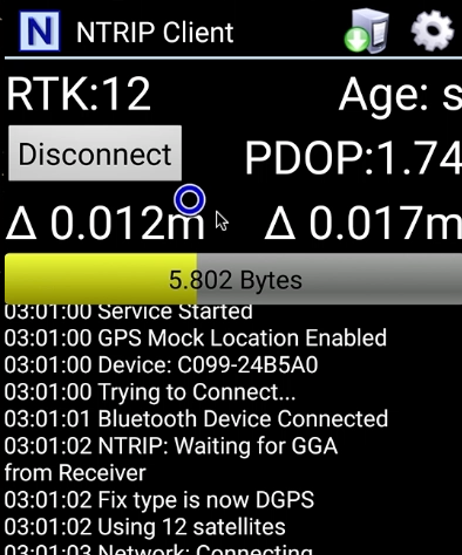
Fig.8 Lefebure, the service log
- the NMEA sentences, scrolling continuously second by second, which show the status of the link with the Android device and of the link with the external correction source, as can be seen in the video in the cloud resources linked below.
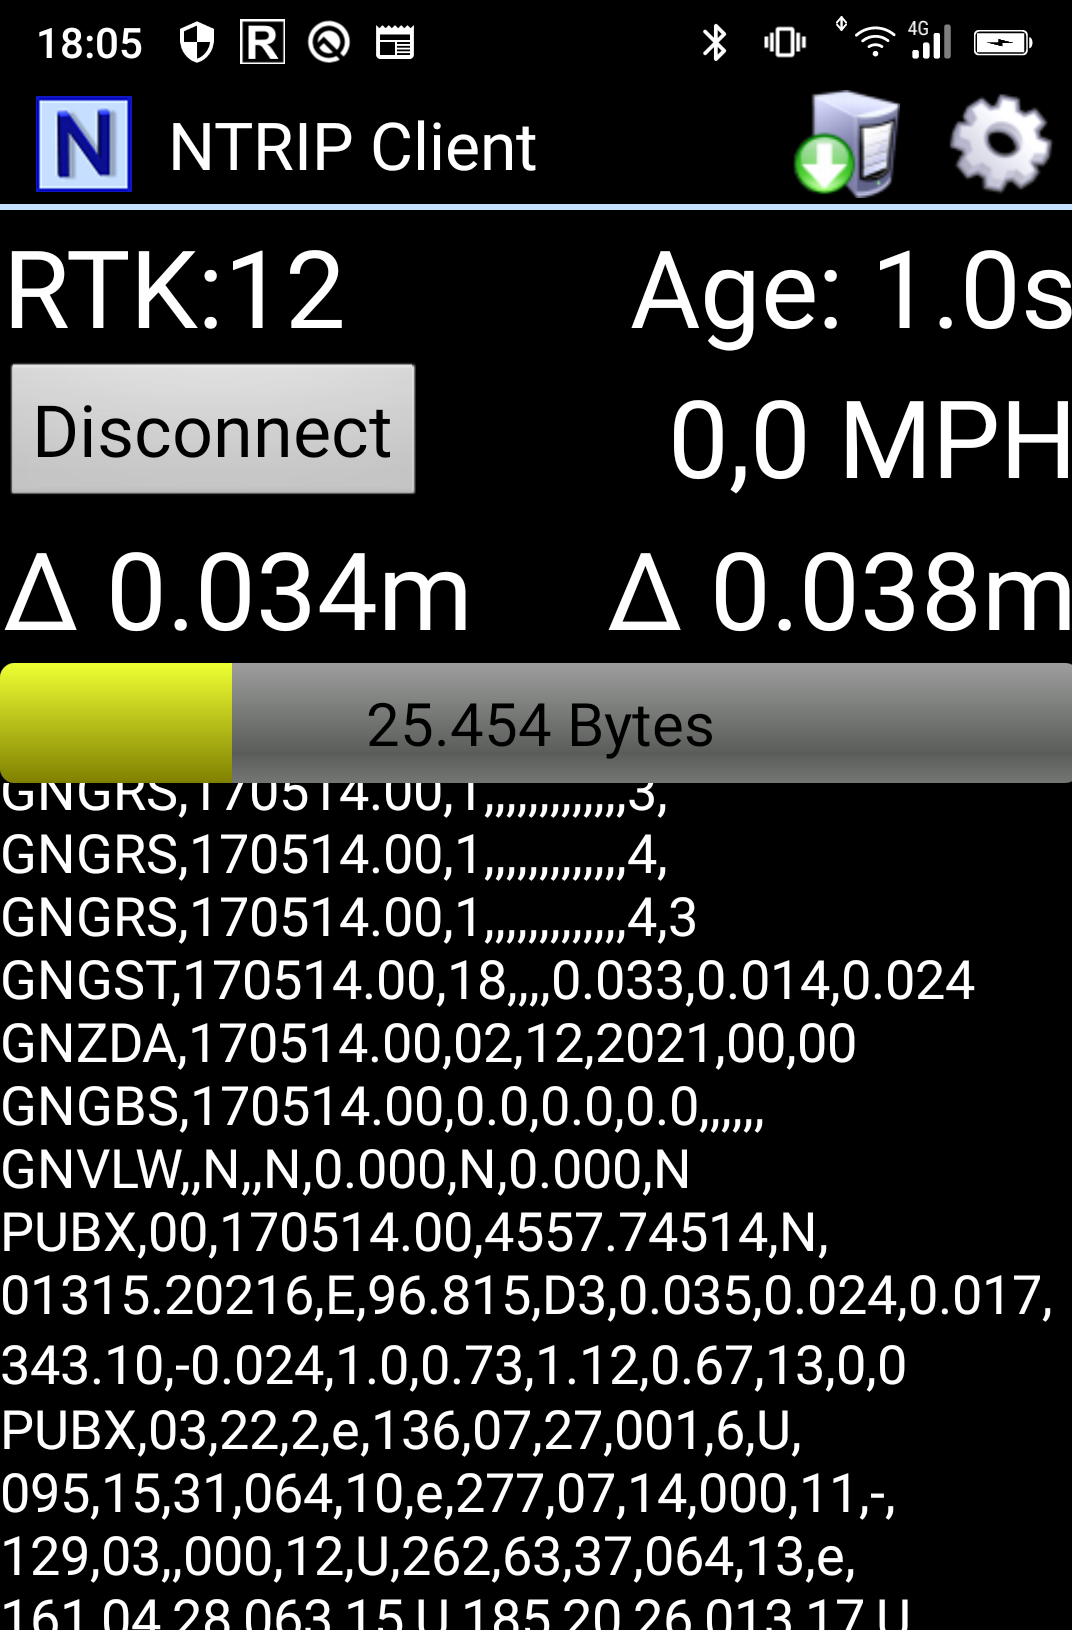
Fig.9 Lefebure, NMEA sentences
Video
Here you can watch a video summarising the whole procedure.
Bluetooth GNSS
This app is free and open source software. It also supports overlaying the data streams of an NTRIP server for professional RTK positioning (centimetre-level accuracy).
Download the latest version from the Play Store.
How to use it
It uses the accurate satellite positioning of powerful external Bluetooth GPS/Galileo/GLONASS/BeiDou receivers instead of the weaker A-GPS built into phones and tablets, for better position accuracy with your favourite map, navigation or survey apps.
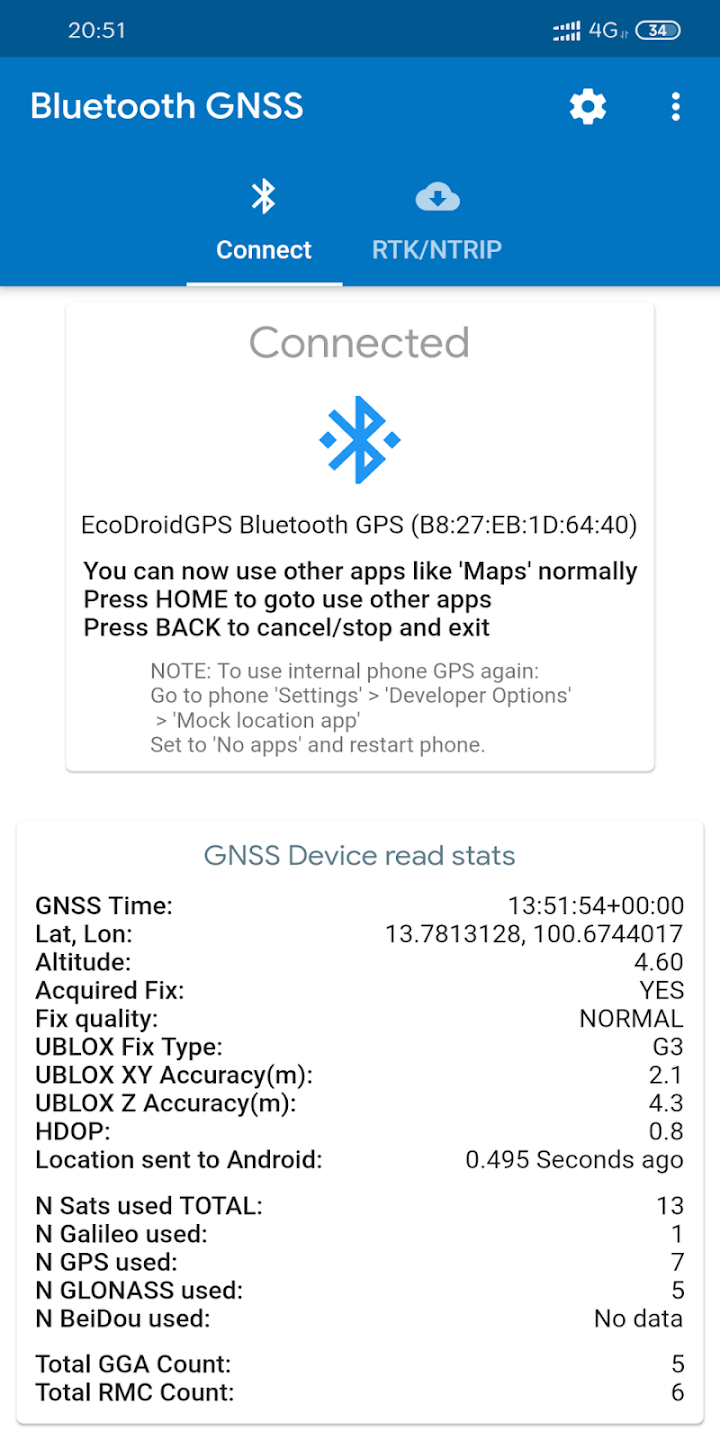
Fig.10 Screenshot of the Bluetooth connection
This app can show the “Accuracy” estimates taken from u-blox “PUBX” accuracy messages, instead of the commonly used “HDOP x CEP” method. This PUBX accuracy reading comes from exactly the same source as the “Accuracy” shown in the U-Center PC tool when the device is connected directly over USB.
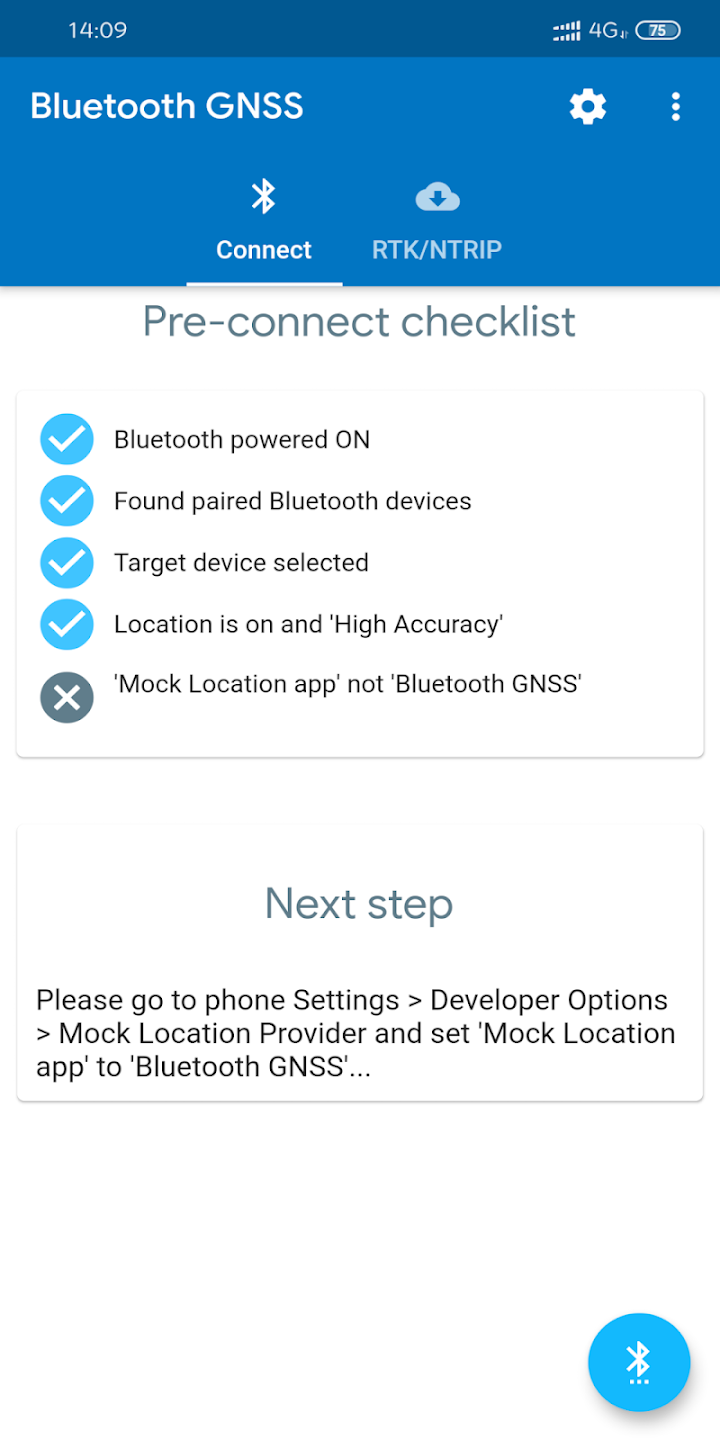
Fig.11 Bluetooth pre-connection checklist
Note
How can you tell whether the target app is actually using this app’s mock location?
While connected, create a file named ‘bt_gnss_test_debug_mock_location_1_1_mode_flag’ in the internal storage (adb command: touch /sdcard/bt_gnss_test_debug_mock_location_1_1_mode_flag) and check whether the target app now shows lat 1.0 and lon 1.0; remove or delete the file to go back to the real lat and lon from the connected Bluetooth device.
GNSS Master
The GNSS Master app lets you:
- Connect to the external GNSS receiver over USB serial (OTG), Bluetooth, BLE and TCP/IP
- Send corrections to your GNSS receiver from the built-in NTRIP client (V1 and V2) and from PointPerfect
- Send the GNSS receiver data to an NTRIP server (V1/V2), a TCP client or a TCP server
- Use the high-precision position from your receiver directly in SW Maps and in every other Android app through Mock Location
- Change your receiver’s configuration to Rover or Base, or upload any custom configuration file
Here you can download the latest version from the Play Store.
We are delighted to announce the launch of our first app: GNSS Master, designed to take your GPS experience to a new level. With GNSS Master you can now unlock the full potential of your external GNSS receiver, for accuracy and customisation you have never had before. Here are the features waiting for you:
GNSS Master connectivity
More about connecting the GNSS receiver. Use any correction service: take advantage of our built-in NTRIP client (V1 and V2) and of PointPerfect to send corrections straight to your GNSS receiver. Enjoy greater accuracy and precision, even in difficult environments.
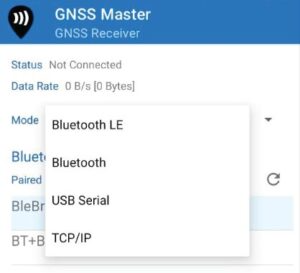
Fig.12 Screenshot of the incoming connections
Share your position and corrections
GNSS Master is versatile: it lets you send your GNSS receiver data to an NTRIP server (V1 and V2), a TCP client or a TCP server. Set your output preferences to match your own needs.
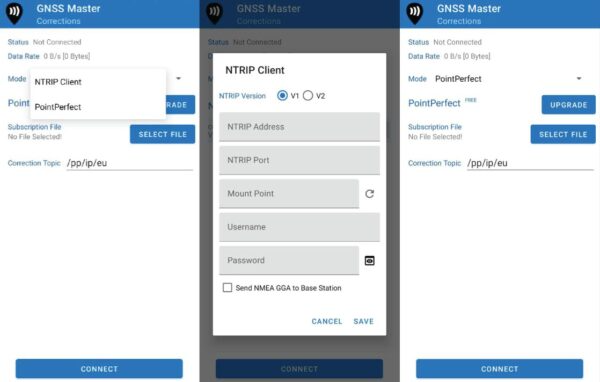
Fig.13 Screenshot of the external NTRIP connections
Main GNSS data output
Use your favourite app: take the high-precision positioning data from your receiver straight into SW Maps and every other Android app through Mock Location. Say goodbye to limitations and make the most of precise positioning.
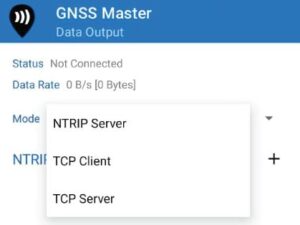
Fig.14 Screenshot of the outgoing connections
GNSS Master sharing
Change your receiver’s configuration: set your receiver up effortlessly. Switch easily from Rover to Base or upload any custom configuration file, so you can tune your receiver’s performance to your own needs.
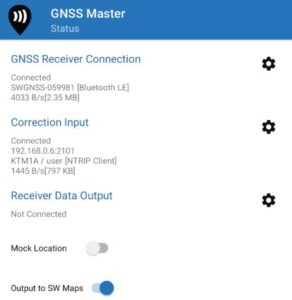
Fig.15 Screenshot of the home page
Main GNSS configuration
Monitor your GNSS status: check the status of your GNSS receiver, the skyplot view and the connection monitoring with a single tap on GNSS Master Status
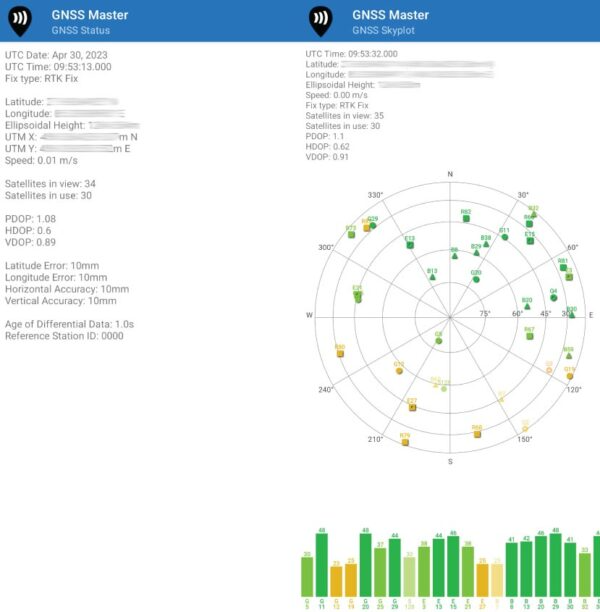
Fig.16 Screenshot with the GNSS status information
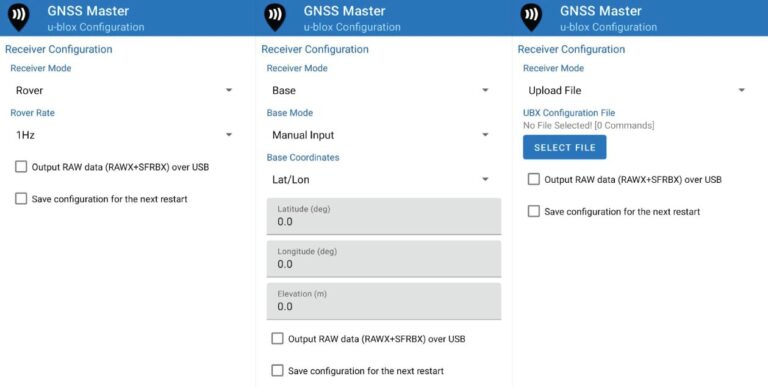
Fig.17 General screenshots of the settings